How to Effectively Sanitize a Sponge Applicator for Optimal Hygiene
Welcome to our comprehensive guide on how to effectively sanitize a sponge applicator for optimal hygiene. Whether you use a sponge applicator for makeup application, art projects, or any other purpose, it is crucial to maintain proper cleanliness to prevent the spread of bacteria and ensure the longevity of your applicator.
Using a dirty sponge applicator can lead to skin irritations, breakouts, and even infections. By following the correct sanitization techniques, you can keep your sponge applicator in excellent condition and protect your skin from potential harm.
The Importance of Sanitizing Your Sponge Applicator
Before we dive into the step-by-step process of sanitizing a sponge applicator, let’s understand why it is essential to do so. A clean sponge applicator not only ensures optimal hygiene but also improves the performance and lifespan of the tool. Here are a few key reasons why you should prioritize regular sanitization:
- Preventing Bacterial Growth: Sponge applicators provide an ideal breeding ground for bacteria due to their porous nature. Regularly sanitizing your sponge helps eliminate these harmful microorganisms and reduces the risk of skin infections.
- Avoiding Product Build-up: Over time, makeup products and other substances can accumulate in your sponge, leading to a compromised application experience. Sanitizing removes residue and product build-up, allowing for smoother and more even makeup application.
- Prolonging Sponge Lifespan: Proper cleaning and sanitization help maintain the integrity of your sponge applicator. By removing dirt, oils, and bacteria regularly, you can extend its lifespan and get more use out of it.
Step-by-Step Guide: How to Clean Your Sponge Applicator
Now that we understand the importance of sanitizing our sponge applicators, let’s explore the step-by-step process to achieve optimal cleanliness:
Step 1: Wet Your Sponge Applicator
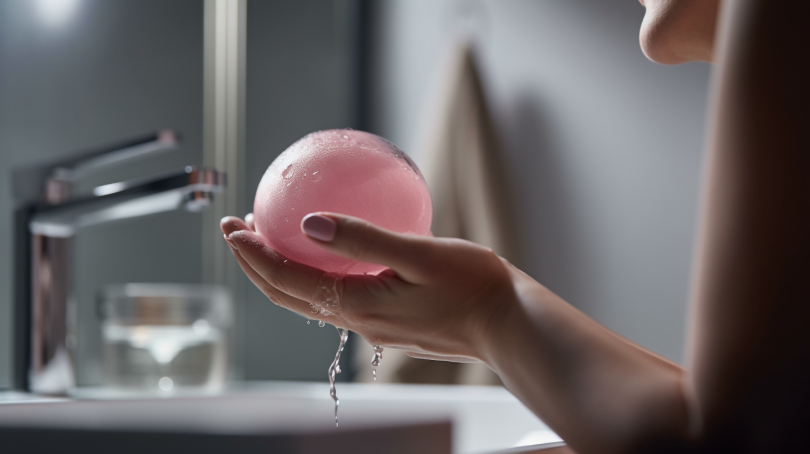
Start by wetting your sponge applicator under running water. Ensure that the sponge is thoroughly soaked, as this will help loosen any product residue and make the cleaning process more effective.
Step 2: Apply a Gentle Cleanser
Next, apply a small amount of mild liquid soap or baby shampoo to your wet sponge. Gently massage the cleanser into the sponge, focusing on areas where makeup residue is likely to accumulate.
Note: Avoid using harsh soaps or cleansers that can damage the sponge material. Stick to gentle options to preserve the integrity of your sponge applicator.
Step 3: Work the Cleanser Into a Lather
Once you have applied the cleanser, work it into a lather by squeezing and massaging the sponge in your hands. This motion helps dislodge any trapped dirt or product build-up within the sponge’s pores.
Step 4: Rinse Thoroughly
Rinse your sponge applicator under running water until all traces of soap or cleanser are gone. Squeeze and release the sponge repeatedly while rinsing to ensure that every part of it is thoroughly cleaned.
Step 5: Disinfect Your Sponge Applicator
To effectively kill bacteria and sanitize your sponge applicator, you can use one of several methods:
- Method 1: Microwaving: Place your damp sponge in a microwave-safe bowl filled with water. Microwave the bowl on high for one to two minutes to kill the bacteria. Be cautious when removing the bowl from the microwave, as it will be hot.
- Method 2: Boiling: Fill a pot with water and bring it to a boil. Submerge your sponge in the boiling water for five to ten minutes. Use tongs or a spoon to handle the sponge during this process.
- Method 3: Soaking in Disinfectant: Prepare a solution of equal parts water and disinfectant, such as hydrogen peroxide or white vinegar. Soak your sponge applicator in this solution for at least 15 minutes before rinsing it thoroughly.
Note: Always check the manufacturer’s instructions before using any of these methods, as some sponges may not be suitable for certain sanitization techniques.
Step 6: Dry Your Sponge Applicator
After sanitizing your sponge, gently squeeze out any excess water. Place it in a clean and well-ventilated area to air dry completely. Avoid using heat sources or direct sunlight to speed up the drying process, as this may damage the sponge material.
Tips for Maintaining Hygiene Between Cleanings
In addition to regular cleaning and sanitization, here are some tips to help you maintain optimal hygiene between washes:
- Wash Your Sponge Frequently: Aim to clean your sponge applicator after every use, especially if you use it with liquid or cream-based products that can harbor bacteria more easily.
- Avoid Sharing Your Sponge: To prevent cross-contamination, refrain from sharing your sponge applicator with others. Each person should have their own sponge for personal use.
- Replace Your Sponge Regularly: No matter how well you sanitize your sponge, it will eventually wear out. Replace your sponge applicator every three to four months or as soon as you notice signs of deterioration.
- Store Your Sponge Properly: After each use, store your sponge in a clean and dry container to prevent dust, dirt, and bacteria from settling onto the surface.
Conclusion
Sanitizing your sponge applicator is an essential step in maintaining optimal hygiene and protecting your skin from potential harm. By following the step-by-step guide outlined in this tutorial, you can effectively remove dirt, bacteria, and product build-up from your sponge.
Remember to clean your sponge regularly and take precautions to prevent cross-contamination. With proper care and maintenance, your sponge applicator will continue to provide excellent performance while keeping your skin healthy and safe.
We hope this guide has been helpful in guiding you through the process of sanitizing your sponge applicator. Now go ahead and enjoy a clean and hygienic makeup or art application experience!